Curing weed is an essential step that can make or break the quality of your buds. You can use the right amount of nutrients and preserve trichomes, but if your buds are not cured properly, you can say goodbye to months of hard work.
The curing process plays an essential part in your final product. First, it extends the lifespan of your buds in storage, allowing you to preserve their potency and flavors. Second, curing also reduces any mold or mildew formation that can destroy your buds and make the weed more toxic.
Curing entails reducing the amount of water content in each bud. A hastily done process can ruin the quality, which puts it to waste. Many connoisseurs like going for different water contents, depending on the application. Some want to go for a 10 percent water level for smoking, while others aim for 12 – 15 percent for loading in vaporizers. Reducing the water content allows you to reduce the risks of bacteria development while bringing out more flavor.
Curing is sometimes confused with drying, as both involve setting the buds in a controlled environment after harvest. But drying is a more passive process, while curing involves you more. Curing has you controlling humidity, storing the buds in containers while venting gas and letting air in, then setting them again for another round before releasing gasses. And like drying, you also need a hygrometer to monitor humidity levels.
Getting Started in Perfectly Curing Weed
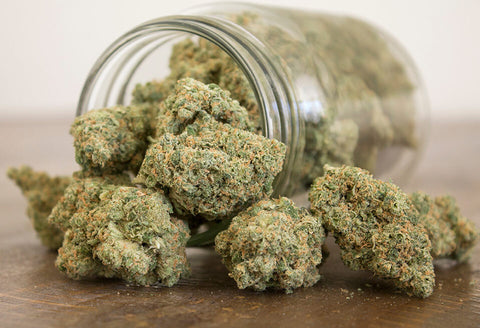 Photo courtesy of 420-seeds.com
Curing your weed starts by having the perfect environment for it. It needs to have controlled humidity and temperature. You can use the same room where you dried your weed as the ideal place to cure weed. It would be best to have enough glass containers with lids that create an airtight seal, such as mason jars. Note that you cannot fill the jars to the brim when curing, so ensure you have extra on hand. Lastly, you need a hygrometer for each container.
You need to know when your weed is ready. As a rule, you should aim for relative humidity (RH) of 55 – 65 percent. If the hygrometer reads anywhere from 65 – 70 percent RH, you must bring it to the ideal levels by keeping the weed in an open glass container for 2 – 4 hours. If the RH is above 70 percent, you must let it stay outside the container to reach ideal RH levels.
You can fill the containers with your weed once you have the needed materials and curing environment. As mentioned, you cannot load the container to the brim as you need a little space to ensure they “burp” properly during the process. Burping is done once a day to let oxygen out and prevent mold and mildew from forming. As a rule, let the containers burp for around 15 minutes before sealing them. During this step, also clear the jars of any mold or mildew that forms.
Curing time can take anywhere between 2 – 4 weeks. As the time varies per plant, you can sense that your weed is fully cured when it becomes more aromatic. The flavor profile should be more prominent when the bud is fully cured. However, if you sense that the scent resembles ammonia, your weed isn’t curing correctly.
Troubleshooting the Curing Process
Let the material sweat inside the jar if your weed drops below 55 percent. You need a clear reading after 24 hours to check if RH levels change. If you want to store the product for extended periods, you must check again within 4 – 5 days.
You may need to introduce more moisture to compensate, which you can do by adding a humidipack or fruit peelings if you have no humidipacks. But remember that adding more moisture can also increase the risk of molds, so you need to pay close attention to the drying and curing process.
If you get a 70 percent RH after a few hours, or it rises by at least one percent, your weed is too wet and needs to rest outside the containers until it drops to the ideal levels.
Freeze Drying for Curing
![Harvest Right [5-Tray] Medium Pro Home Freeze Dryer w/ Mylar Kit](https://cdn.shopify.com/s/files/1/1383/1731/files/harvest-right-black-premier-pump-harvest-right-powder-coated-medium-home-freeze-dryer-w-mylar-starter-kit-39438650409176_5000x_371aab0f-deb4-48a5-8869-5664b9beb161_480x480.webp?v=1693243983)
If you have the resources to spare, you can also use a freeze dryer as an alternative to curing weed. This method cuts the curing time from 2 – 4 weeks to 24 – 36 hours. Unlike curing with the traditional methods, you can put your weed inside the freeze dryer and let the machine do the rest.
To give you an idea of how this process works, a freeze dryer will take your buds to 35 degrees Fahrenheit. This process is relatively quick to avoid the formation of large ice crystals. After this phase, any ice crystals formed are vaporized, and a vacuum will suck out the vapor into a collection chamber that turns them into ice. Finally, the weed gradually returns to room temperature while the ice melts.
Curing your weed with a freeze dryer only requires putting them into the freeze dryer tray without overloading. Then set the freeze dryer to desired temperatures, and it will do the rest.
Storing your Cured Weed
Once you’re content with the output of your weed, you can then proceed to store them. Ensure you don’t introduce more water content to keep your cured weed. Ideal containers include vacuum-sealed mylar packs or airtight glass containers. You may want to add some oxygen absorbers, especially if you plan to prolong the storage.
It would be best to store your cured weed in a cool, dark place so it doesn’t degrade over time. You can also stuff your containers to prevent oxygen from circulating.
Conclusion
The curing process of weed is perhaps the most critical step. It makes a bud most attractive and prepares the weed for consumption.
The key to a good cure is having enough patience for the process. While freeze dryers can speed up the process, not everyone has the means to obtain a freeze dryer. Knowing what a good cured bud is will help you develop sufficient knowledge to become a cannabis expert.
It takes time to get the perfectly cured weed, but with practice, you will be able to master the art of curing weed perfectly.